

Introduction
Maintaining a pristine lawn has never been easier thanks to the rise of robotic lawnmowers. However, any robotic mower owner knows that gardens are dynamic spaces. Gardens change with the seasons; trampolines are set up for the summer, flower beds are replanted, and temporary obstacle courses or paddling pools appear and disappear. Constantly digging up and splicing your main boundary wire to accommodate these temporary changes is a tedious, exhausting chore.
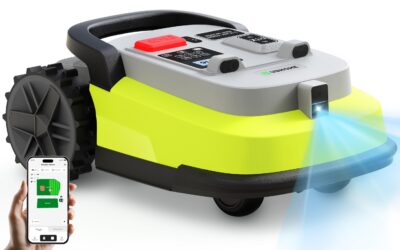
This is where the WORX WA0892 Landroid Module OffLimits comes into play. Designed specifically as an add-on accessory for compatible WORX Landroid robotic mowers, this smart expansion module promises a hassle-free solution for temporary and permanent zone exclusion. By utilizing magnetic strip technology, it allows homeowners to establish “no-go” zones without ever having to touch their main perimeter wire. In this comprehensive review, we will dive deep into the features, performance, setup process, and real-world utility of the WORX WA0892 to help you decide if it is the right investment for your WORX Landroid OffLimits Module: Easy Garden Protection Guide maintenance routine in August 2026.
—
Product Overview
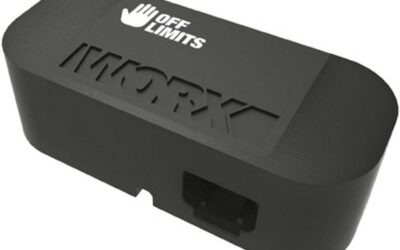
The WORX WA0892 Landroid Module OffLimits is an optional sensor upgrade that installs directly into the underside of compatible WORX Landroid robotic lawnmowers. Once installed, the sensor detects magnetic fields emitted by the included magnetic strips, allowing the mower to instantly recognize designated boundary areas and turn away before crossing them.
Priced competitively at around 34, this module is highly accessible for homeowners looking to protect seasonal garden features or fragile landscaping. The package is comprehensive, providing everything you need to establish several off-limits zones right out of the box.
Technical Specifications & Compatibility
- Product Compatibility: Designed specifically for 2021 Landroid models including WR147E, WR147E.1, WR148E, WR165E, and WR167E. Note: This module is NOT compatible with Landroid Vision models.
- Detection Technology: Dual-sensor magnetic detection.
- Installation Location: Pre-designated expansion slot on the undercarriage of the mower.
- Box Contents:
- 1 x Off-Limits Sensor Module
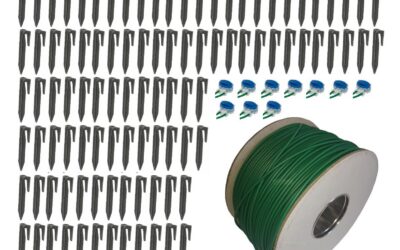
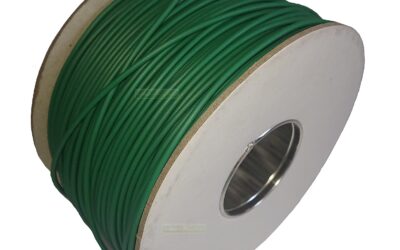
- 4 x 5-meter Magnetic Strips (20 meters total)
- 8 x Magnetic Strip Connectors
- 24 x Heavy-Duty Mounting Hooks
The core value proposition of the WA0892 is convenience. Rather than splicing into your existing boundary wire—a process that introduces weak points and risks signal loss—you simply lay the magnetic strip flat on the lawn, pin it down with the provided hooks, and let the upgraded Landroid do the rest. The strip can be easily removed, repositioned, or stored away when the seasonal obstacle (like a winterized pool or trampoline) is removed.
—
Pros
- Zero-Splicing Boundary Creation: The standout advantage of this module is that it requires absolutely no physical connection to your main boundary wire. You can create independent “islands” of protection anywhere on your lawn without disrupting the primary electrical loop.
- Highly Flexible and Temporary: Ideal for seasonal garden equipment. If you set up a paddling pool or a fire pit for the summer, you can lay the magnetic strip around it in minutes, and pack it away in the autumn when the equipment is stored.
- Straightforward Installation: Installing the module itself is a simple plug-and-play process. You turn off the mower, flip it over, unscrew the protective bay cover, plug the sensor into the dedicated slot, secure it, and turn the mower back on. The Landroid automatically detects the hardware upgrade.
- Generous Accessory Package: The box includes 20 meters of total magnetic strip length, along with plenty of connectors and pegs. This is generally more than enough to protect 2 to 3 medium-sized garden features immediately.
- Cost-Effective Garden Protection: At a price point of approximately 34, the WA0892 is a highly affordable upgrade that saves hours of manual labor and protects expensive garden furniture, trees, or delicate seasonal flower pots from being bumped or damaged by the mower.
- Reliable Sensor Accuracy: Once configured correctly, the dual-sensor system is incredibly precise. The mower detects the magnetic field well before physically touching the strip, executing a clean turn to continue its mowing pattern elsewhere.
—
Cons
- Strict Layout Guidelines: The magnetic strip must be laid out according to very specific rules to work reliably. It must be laid flat, in a closed loop (circular or elliptical), and must avoid sharp corners or straight lines. Failing to follow these rules can result in the mower ignoring the boundary.
- Distance Limitations: The off-limits zones must be placed at least 2 meters away from your main boundary cable or other off-limits zones. This means it is not suitable for tight, narrow garden corridors or features located very close to the edge of your lawn.
- Not Compatible with Landroid Vision: Homeowners who own the newer WORX Landroid Vision models cannot use this module, as those mowers rely on camera-based AI obstacle recognition rather than physical magnetic sensors.
- Aesthetic Impact of Surface Strips: While the green magnetic strips blend in decently with grass, they sit on top of the lawn initially. Until the grass grows over and hides them naturally, the strips and plastic pegs are visible and can be a slight eyesore.
—
Customer Reviews Analysis
With an average rating of 4.3 out of 5 stars across 412 reviews, the WORX WA0892 Landroid Module OffLimits is highly regarded by the robotic mowing community. Customers consistently praise the product for doing exactly what it promises: saving them the headache of splicing boundary wires.
What Customers Love
Many reviewers note that the module is a “lifesaver” for yards with young children. Families who frequently set up temporary play structures, lawn games, or inflatable pools find the temporary nature of the magnetic strips to be incredibly convenient. Users also highlight the ease of the physical installation of the chip under the mower, stating that it takes less than five minutes from opening the box to having the mower recognize the new hardware.
Common Complaints & Workarounds
The most common complaints stem from users who did not closely read the installation instructions. Some buyers tried to lay the magnetic strip in a straight line to block off a patio or fence line, only to find the Landroid crossed right over it. Reviewers emphasize that the strip must form a closed circle or ellipse to generate the proper magnetic field loop that the sensor recognizes.
Another minor complaint is that the magnetic strips can occasionally be shifted by heavy rain or curious pets if not pinned down tightly. Experienced users recommend purchasing extra pegs if you have uneven terrain to ensure the strip stays completely flat against the soil, allowing the grass to grow over and anchor it naturally.
—
Frequently Asked Questions
1. Can I bury the magnetic strips underground?
While the manufacturer recommends laying the magnetic strips flat on top of the lawn using the provided pegs, many users have successfully buried them 1 to 2 centimeters below the surface. However, burying them too deep will weaken the magnetic field, which may cause the Landroid to miss the boundary. For best results, pin them to the surface and let the grass naturally cover them over a few weeks.
2. Can I use this to block off permanent features like trees or garden beds?
Yes, absolutely. While the WA0892 is heavily marketed for temporary use, it works perfectly fine as a permanent solution for protecting young trees, permanent flower beds, or gravel pits. It is a much easier alternative to splicing the main boundary wire during your initial lawn setup.
3. Why is the mower crossing over my magnetic strip?
If your Landroid is ignoring the off-limits zone, double-check the following:
- Ensure the magnetic strip forms a completely closed circle or ellipse.
- Make sure the strip is laid flat and is not twisted.
- Verify that the off-limits zone is at least 2 meters away from your main boundary wire.
- Check the underside of your Landroid to ensure the OffLimits module is clicked securely into its slot and the firmware is updated.
4. Can I cut the magnetic strips to shorter lengths?
Yes, you can cut the magnetic strips to fit the exact circumference of the area you want to exclude. Just ensure that when you lay them down, you connect the ends securely using the provided magnetic strip connectors to maintain a continuous loop.
—
Who Should Buy This Product?
The WORX WA0892 OffLimits Module is a must-have accessory for:
- Families with Kids or Pets: If your lawn frequently hosts temporary structures like trampolines, soccer goals, dog agility courses, or paddling pools, this module will save you hours of manual mowing or wire-splicing frustration.
- Avid Gardeners: If you love changing your garden layout, adding seasonal potted plants, or creating temporary flower displays, this module gives you the flexibility to adapt your robotic mower’s path instantly.
- New Landroid Owners: If you are setting up your Landroid for the first time and want to avoid the complex geometry of routing the main boundary wire around multiple trees or islands, using this module is a massive time-saver.
This product is not suitable for those who own Landroid Vision models, or those with very small, narrow lawns where keeping a 2-meter distance from the main boundary wire is physically impossible.
—
Final Verdict
For owners of compatible WORX Landroid models, the WORX WA0892 Landroid Module OffLimits is one of the most practical and reasonably priced upgrades you can buy. At roughly 34, it solves one of the biggest pain points of robotic mower ownership: adapting to a changing yard.
While it does require strict adherence to layout rules—such as maintaining closed loops and keeping a safe distance from the primary boundary—the sheer convenience of plug-and-play installation and zero-splicing zone exclusion makes it a stellar addition. If you want to protect your seasonal garden gear and keep your WORX Landroid OffLimits Module: Easy Garden Protection Guide looking pristine throughout 2026 without the headache of constant wire maintenance, the WA0892 is highly recommended.