

To charge a robot lawn mower, you simply need to ensure the charging station is correctly installed and the mower is docked. Most modern units automatically return to their base when the battery hits a specific threshold (usually 15-20%). Proper charging ensures your lawn stays manicured throughout August 2026.
Expert Summary: Charging Your Robot Mower in 2026
For those seeking a quick overview of How to Charge a Robot Lawn Mower: Guide, here are the essential takeaways for optimal battery performance:
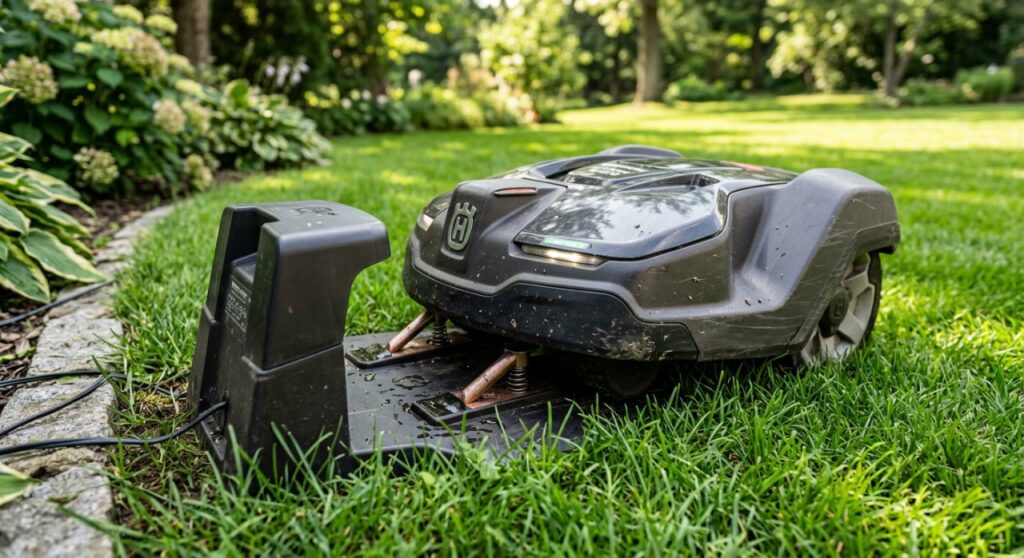
- Automatic Docking: Most models like the Husqvarna Automower or Worx Landroid use a “home” signal to find the base autonomously.
- Contact Maintenance: Keep charging pins and contact plates free of debris, oxidation, and grass clippings to prevent charging failures.
- Optimal Environment: Place the charging station on level ground, out of direct sunlight, and within reach of a GFCI-protected outlet.
- Winter Care: Always charge the battery to 100% before storing the mower for the winter to prevent deep discharge damage.
Essential Tools for How to Charge a Robot Lawn Mower: Guide
Before you begin, ensure you have the following items to maintain a perfect connection between your mower and its power source.
| Tool/Material | Purpose | Importance |
|---|---|---|
| Charging Station | The primary power hub for the mower. | Critical |
| Low-Voltage Cable | Connects the transformer to the station. | Critical |
| Fine Sandpaper (400+ grit) | Removes oxidation from metal contact points. | Maintenance |
| Microfiber Cloth | Cleans the mower’s sensors and plates. | Maintenance |
| Multimeter | Tests the continuity of the power supply. | Troubleshooting |
Step 1: Install the Charging Station Correctly
The most important part of How to Charge a Robot Lawn Mower: Guide is the initial setup. If the base isn’t level or reachable, the mower will fail to dock, leaving you with a dead battery in the middle of your yard.
Select a Level Location
Position the charging station on a flat surface. If the base is tilted, the mower’s charging pins may not align with the station’s receptors. Avoid placing the base in a corner or a narrow passage where the mower might struggle to maneuver.
Ensure Proximity to Power
Locate an outdoor-rated electrical outlet. Use the manufacturer-provided transformer and low-voltage cable. Never use a standard extension cord for permanent installation, as this can lead to voltage drops and fire hazards.
Secure the Base
Anchor the station to the ground using the provided plastic screws or pegs. This prevents the station from shifting when the mower docks with force, ensuring a consistent connection every time.
Step 2: Connect the Boundary and Guide Wires
For the mower to find its way back to charge, the wiring must be flawless. The mower follows these wires like a roadmap to the power source.
Connect the Boundary Wire
Plug the ends of the boundary wire into the back of the charging station. Most stations have color-coded terminals (often Red/Green). This wire creates the “fence” that tells the mower where to stop.
Install the Guide Wire (If Applicable)
Run the guide wire from the back of the station across the lawn to the furthest point of the boundary. This is a “shortcut” that helps models like the Gardena Sileno find the station quickly when the battery is low, preventing the mower from “searching” until it dies.
Step 3: Initiate the First Charge
Before the first mow of the season in August, you must perform a full initial charge to calibrate the battery management system.
Power On the Station
Verify the LED indicator on the charging station. A solid green light usually indicates a healthy loop and power supply. A flashing light often signals a wire break or a power fault.
Manual Docking for Setup
Slide the mower into the charging station manually for its first session. Ensure the charging strips on the mower are firmly touching the pins on the base. You should see a charging icon or a flashing light on the mower’s display.
Set the Charging Schedule
Program your mower via its built-in menu or smartphone app. Most users prefer charging during the night or during the hottest part of the day to avoid mowing when the grass is wet with dew.
Step 4: Maintain the Charging Contacts
Over time, dirt and oxidation can create resistance, slowing down the charging process or preventing it entirely.
Clean the Metal Plates
Wipe the contact plates on the mower and the pins on the station with a dry cloth once a month. If you notice a green or black film (oxidation), gently rub it with fine-grit sandpaper until the shiny metal is visible.
Check for Debris
Inspect the docking area for spider webs, snail trails, or grass buildup. These can physically block the mower from pushing far enough into the station to engage the sensors.
Step 5: Winter Charging and Storage
How to Charge a Robot Lawn Mower: Guide is different during the off-season. Lithium-ion batteries can be permanently damaged if they reach 0% charge in freezing temperatures.
Perform a Final Charge
Charge the mower to 100% before the first frost of 2026. Once fully charged, turn the main power switch to the “OFF” position.
Store in a Controlled Climate
Move the mower and, if possible, the charging station (or at least the transformer) into a garage or basement. Keep the battery in an environment above 40°F (5°C).
Mid-Winter Top-Off
Recharge the mower once or twice during the winter. Even when off, batteries slowly lose voltage. A quick 2-hour charge in mid-January ensures the battery cells stay healthy for the spring.
Common Mistakes to Avoid
- Using Pressure Washers: Never spray the underside of your mower or the charging station with high-pressure water. This can short-circuit the charging electronics.
- Ignoring LED Signals: If your base station is flashing yellow or blue, don’t ignore it. This usually means the mower will not be able to find its way home to charge.
- Leaving the Transformer on the Ground: Always mount the transformer on a wall. Leaving it on the ground can lead to water ingress during heavy rain.
Pro Tips for Maximum Battery Life
- Avoid High Heat: If your yard has a very sunny spot, build a small “mower garage” or cover for the station. High temperatures during charging can degrade Li-ion cells.
- Check the “Loop” Signal: If the mower is docked but not charging, use a multimeter to check if the station is outputting the correct voltage (usually 24V to 32V DC).
- Software Updates: Keep your mower’s firmware updated. Manufacturers often release updates that optimize charging algorithms to extend battery lifespan.
FAQ: Frequently Asked Questions about How to Charge a Robot Lawn Mower: Guide
How long does it take to charge a robot lawn mower?
Most robot mowers take between 60 to 90 minutes to reach a full charge. This usually provides 60 to 120 minutes of mowing time, depending on the grass height and battery capacity.
Can I leave my robot mower on the charger all the time?
Yes. Modern robot mowers have smart charging circuits that stop drawing power once the battery is full. Leaving it docked is the safest way to ensure it is ready for its next scheduled task.
Why is my robot mower not docking correctly?
The most common reasons are an unlevel charging base, dirty contact pins, or the boundary wire being installed too close to the station entrance, causing signal interference.
Should I unplug the charging station during a thunderstorm?
While most stations have basic surge protection, it is a “best practice” to unplug the transformer and disconnect the boundary wires during severe lightning storms to prevent high-voltage surges from frying the motherboard.
Conclusion
Mastering How to Charge a Robot Lawn Mower: Guide is the key to a hassle-free, automated lawn care experience. By ensuring a level base, maintaining clean contacts, and following a proper winter storage routine, you can extend your mower’s battery life by several years.
Ready to optimize your lawn? Check your charging pins today and ensure your mower is running the latest firmware for the best performance in 2026. If your mower still fails to charge after following these steps, consult your user manual for specific error codes or contact a certified technician.