
How to Fix Recoil on Lawn Mowers: A Complete Step-by-Step Guide
Fixing the recoil starter on a lawn mower restores the pull-start mechanism so your engine fires up reliably every time. Most repairs take 30–60 minutes and cost under $15in parts — far cheaper than a service call.
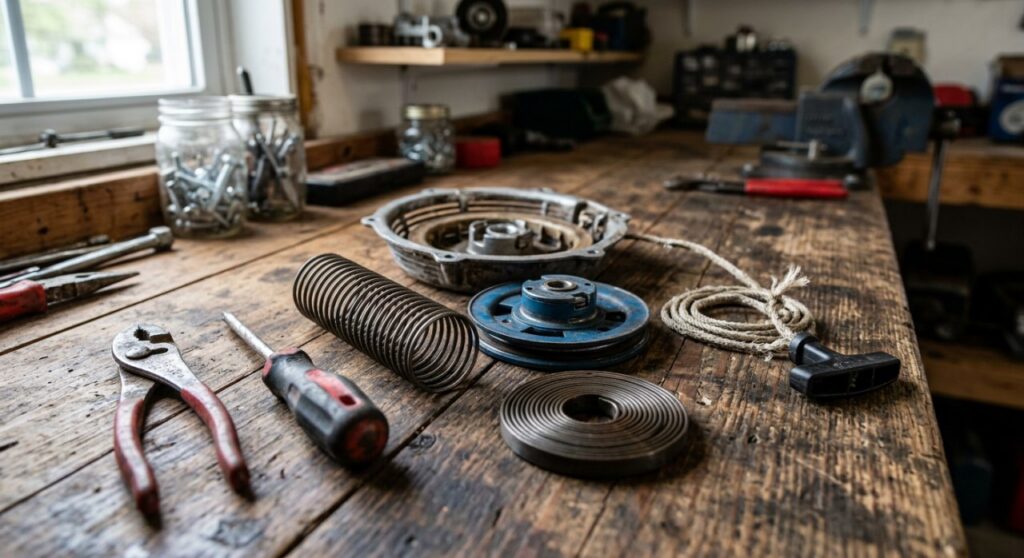
Expert Summary
- A broken recoil starter is one of the most common lawn mower problems — symptoms include a rope that won’t retract, a handle that pulls out completely, or a rope that feels loose with no resistance.
- Most recoil failures are caused by a broken recoil spring, a frayed or snapped pull rope, or a worn pawl (catch mechanism) — all are DIY-fixable with basic tools.
- Replacing the recoil spring requires careful handling — it is under tension and can snap back sharply if released incorrectly.
- Honda, Briggs & Stratton, Husqvarna, and Craftsman mowers share similar recoil starter designs, so these steps apply broadly across brands.
- No special tools are required — a screwdriver, needle-nose pliers, and replacement rope or spring (matched to your model) are all you need.
What You Need Before You Start
Having the right materials on hand prevents mid-repair delays. Check your mower’s model number (usually on a sticker on the engine block) before buying replacement parts.
Tools and Materials Table
| Item | Purpose | Notes |
|---|---|---|
| Flathead & Phillips screwdriver | Remove recoil housing cover | Have both sizes |
| Needle-nose pliers | Handle spring, thread rope | Essential for spring work |
| Replacement pull rope | New starter rope | Match diameter & length to model |
| Recoil spring (if needed) | Restore retraction tension | Buy model-specific |
| Replacement pawls/clips | Fix engagement mechanism | Often sold as kit |
| Work gloves | Protect hands from spring snap | Leather preferred |
| Safety glasses | Eye protection during spring work | Non-negotiable |
| Lighter or matches | Seal rope end to prevent fraying | Any type |
| Zip tie or clamp | Hold puley during reassembly | Standard size |
Step 1: Diagnose the Problem First
Identify exactly what is broken before ordering parts — this saves time and money.
Pull the starter rope slowly and observe what happens. Each symptom points to a specific fault.
Common Symptoms and Their Causes
| Symptom | Likely Cause |
|---|---|
| Rope pulls out but won’t retract | Broken or dislodged recoil spring |
| Rope feels completely loose, no resistance | Spring broken or unhoked |
| Rope is frayed, snapped, or missing | Worn or broken pull rope |
| Handle pulls out fully and detaches | Rope knot failed inside puley |
| Rope retracts but engine doesn’t crank | Worn or broken pawls/engagement clips |
| Grinding or clicking sound when pulling | Damaged puley or housing |
Pro Tip: Pull the rope out about 12inches and release it. If it snaps back crisply, your spring is intact — focus on the rope or pawls instead.
Step 2: Disconnect the Spark Plug Wire
Always disable the ignition before working on any mower component. This prevents accidental engine starts.
Locate the spark plug on the side of the engine block — it looks like a black rubber cap with a wire attached. Pull the wire cap straight off the plug.
Tuck the wire away from the plug so it cannot accidentally reconnect while you work. This single step takes10seconds and prevents serious injury.
Step 3: Remove the Recoil Starter Assembly
Detach the recoil housing from the engine so you can work on it at a bench. Working flat on a table is far easier than working at an angle on the mower.
Sub-Steps for Removal
- Locate the mounting bolts — typically3 to 4 bolts around the perimeter of the recoil housing on top of the engine.
- Remove each bolt with the appropriate screwdriver or socket. Set bolts in a cup so none roll away.
- Lift the assembly straight up — it should detach cleanly. Some models have a fuel tank bracket in the way; remove that first.
- Note the orientation before flipping the assembly over — take a phone photo if it helps.
Common Mistake: Forcing the housing off. If it resists, check for a hidden bolt or a throttle cable clipped to the housing.
Step 4: Disassemble the Recoil Housing
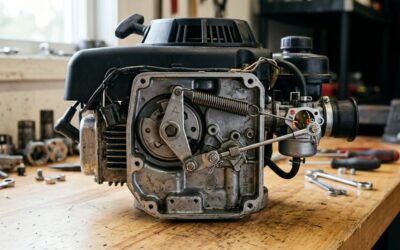
Open the housing carefully to access the puley, spring, and rope. The recoil spring is under tension even when the rope is broken — treat it with respect.
Put on your safety glasses and gloves before this step.
How to Put Recoil Top on Lawn Mowers — Disassembly First
- Flip the recoil assembly upside down on your workbench.
- Locate the center bolt or retaining clip that holds the pulley in place.
- Remove the center fastener slowly — keep your thumb lightly on the pulley as you do, because the spring may push it up slightly.
- Lift the pulley straight out — move slowly and controlled.
- Note how the spring sits in its recess — photograph it before touching anything.
Warning: If the recoil spring is intact, it will be coiled tightly inside the housing or around the pulley hub. Do not let it fly loose — it can cause cuts and eye injuries.
Step 5: Replace the Pull Rope
A new rope is the most common and easiest recoil fix. If your rope is frayed, snapped, or the handle came off, this is your repair.
How to Fix Recoil Rope Step by Step
- Measure the old rope (or the rope channel in the puley) to determine the correct length. Most walk-behind mowers use #4 (3/16″) or #4.5 (7/32″) diameter rope,60–90 cm long.
- Cut the new rope to length with scissors. Immediately melt both ends with a lighter for 2–3 seconds to prevent fraying.
- Thread the rope through the housing eyelet from outside to inside.
- Feed the rope into the pulley slot — most pulleys have a small notch or hole where the rope anchors.
- Tie a figure-eight knot at the end that anchors inside the pulley. Pull it tight and trim excess.
- Wind the rope around the pulley in correct direction — the same direction the puley rotates when you pull. Refer to your photo from Step 4.
- Thread the outer end through the starter handle and tie another figure-eight knot. Pull firmly to seat it.
- Test retraction by holding the housing and slowly releasing the puley — the rope should wind back cleanly.
Pro Tip: Before threading the rope, pre-tension the pulley by rotating it 2–3 turns in the wind-up direction and holding it with a zip tie through a spoke. This gives the rope proper spring tension when assembled.
Step 6: Replace the Recoil Spring
If the rope retracts weakly or not at all, the recoil spring needs replacing. This is the trickiest part of the repair but very doable with care.
How to Remove the Old Spring
- Hold the housing firmly with the spring side facing away from your face.
- Lift out the old spring with needle-nose pliers — if it is broken, the pieces will come out easily.
- Clean the spring recess with a rag — remove any debris or rust.
How to Install the New Recoil Spring
- Check the new spring orientation — the outer hook must face outward to catch the housing wall; the inner hook faces inward to catch the pulley hub.
- Coil the spring loosely in your gloved hand, keeping the hooks oriented correctly.
- Place the spring into the recess starting with the outer hook — it onto the housing wall peg first.
- Press the spring coils down flat using a screwdriver handle or dowel, working from outside to inside.
- Seat the inner hook onto the pulley hub — you will feel it click or catch.
Common Mistake: Installing the spring backward. If it is reversed, the puley will spin freely in both directions with no tension. Remove and flip it.
How to Put Recoil on Lawn Mowers After Spring Replacement
- Place the puley back into the housing over the spring, aligning the center hole.
- Pre-tension the pulley — rotate it 3–4 full turns in the wind-up direction.
- Hold tension with a zip tie through the puley spokes, loped around housing fin.
- Install the center bolt or retaining clip while holding tension.
- Thread the rope as described in Step 5.
- Remove the zip tie — the rope should retract firmly.
Step 7: Replace the Pawls (If the Rope Works but Engine Won’t Crank)
If the rope pulls and retracts normally but the engine doesn’t turn over, the pawls are worn. Pawls are the small plastic or metal tabs that engage the engine flywheel when you pull the rope.
Steps to Replace Pawls
- Locate the pawls on the underside of the puley — they are small hinged tabs, usually 2–3 per pulley, held by small clips or screws.
- Remove the clips or screws holding each pawl and lift them out.
- Compare old and new pawls — ensure the shape, size, and spring tension match.
- Install new pawls in the same orientation. The tab should flip outward under centrifugal force when the rope is pulled.
- Secure with the original clips or screws — do not over-tighten plastic pawl seats.
Pro Tip: Buy pawls as a complete kit for your specific engine model. A kit typically costs $5–$10 and includes pawls, springs, and retaining clips.
Step 8: Reassemble and Reinstall the Recoil Starter
Reassemble in reverse order and confirm everything moves freely before bolting back onto the mower.
How to Put Recoil Top on Honda Lawn Mowers and Other Brands
- Confirm the rope winds and retracts smoothly with firm tension before reinstalling.
- Align the housing over the engine — check that the rope eyelet lines up with the housing exit hole.
- Lower the assembly onto the engine — some models have alignment pins, so look for them.
- Install mounting bolts by hand first, then tighten in a cross pattern to seat evenly.
- Reconnect the spark plug wire.
- Pull the starter rope with the mower on a flat surface — it should engage and crank the engine normally.
Common Mistake: Over-tightening the mounting bolts on plastic housings — snug is enough.
Step 9: Test the Repair
Pull the rope2–3 times and confirm full engagement before considering the job done.
Check for these signs of a successful repair:
- Rope retracts fully and firmly after each pull
- Handle stays attached to the rope
- Engine cranks when rope is pulled (you should feel compression resistance)
- No grinding, slipping, or loose feel
If the engine still doesn’t start after cranking correctly, the recoil is fine — the issue is elsewhere (fuel, spark, or carburetor).
Pro Tips from the Workbench
- Label everything with masking tape as you remove it — write “left spring hook” or “top side” directly on the tape for foolproof reassembly.
- Buy OEM or brand-matched parts when possible. Generic rope and springs sometimes differ slightly in diameter or tension, causing premature failure.
- Apply a tiny drop of lightweight oil to the center puley shaft before reassembling — it reduces friction and extends spring life.
- Store a spare pull rope in your mower’s storage bag. A snapped rope mid-season is a common problem and a $3 rope solves it in10 minutes if you have one on hand.
- Pre-tension is everything — a correctly pre-tensioned pulley (2–4 turns depending on rope length) makes the rope snap back crisply. Too little tension = slow retraction. Too much = rope breaks quickly.
- For Honda GCV160/GCV190engines, the recoil assembly doubles as the top engine cover — reassembly must align the oil filler cap and air filter mounts or it will not seat flat.
Common Mistakes to Avoid
| Mistake | Why It’s a Problem | Fix |
|---|---|---|
| Skipping safety glasses | Recoil spring can snap and cut | Always wear eye protection |
| Not photographing before disassembly | Forget spring/rope orientation | Take photos on your phone first |
| Wrong rope diameter | Rope jams in housing or slips off puley | Match rope to model spec |
| Installing spring backward | No retraction tension | Check hook orientation before installing |
| Forgetting to pre-tension puley | Rope retracts slowly or not at all | Wind puley 2–4 turns before threading rope |
| Over-tightening center bolt | Cracks plastic puley hub | Tighten to snug only |
| Reconnecting spark plug too early | Risk of accidental engine start | Last step before testing only |
FAQ
Q: How do I know if my recoil spring is broken or just dislodged?
Pull the rope out fully and release it. If it doesn’t retract at all, the spring is likely broken. If it retracts weakly or partially, the spring may just be unhooked from the pulley hub — disassemble and reseat it before buying a replacement.
Q: Can I fix a recoil starter without buying new parts?
Sometimes. If the rope is intact and the spring is just dislodged, you can reseat both without new parts. However, a broken spring or frayed rope cannot be repaired — they must be replaced. Replacement rope costs $3–$5 and a spring costs $5–$12.
Q: How long does it take to fix a recoil starter on a lawn mower?
A rope replacement takes 15–20 minutes once you have the parts. A full spring and rope replacement takes 30–60 minutes for a first-time repair. Subsequent repairs on the same mower are typically faster because you know the assembly.
Q: Are recoil starters the same on Honda, Briggs & Stratton, and Husqvarna mowers?
The core design — housing, pulley, spring, rope and pawls — is nearly identical across brands. The main differences are bolt patterns, rope diameter, and spring dimensions. Always match parts to your specific engine model number, not just the mower brand.
Q: What if I fix the recoil but the mower still won’t start?
If the rope pulls, retracts, and you feel compression resistance when cranking, the recoil is working correctly. A no-start after a good crank points to a fuel, spark, or carburetor issue — check for fresh fuel, a functioning spark plug, and a clean air filter next.
Conclusion
Fixing the recoil starter on a lawn mower is one of the most satisfying DIY repairs — it is mechanical, logical, and completely achievable without prior experience. Whether you are replacing a snapped rope, re-tensioning a spring, or swapping out worn pawls, the entire process follows the same sequence: diagnose, disassemble, replace, reassemble, test.
The total parts cost for most repairs is under $15, and the skills transfer to virtually every pull-start small engine you will ever own — pressure washers, snow blowers, and generators all use the same basic mechanism.
If your mower is sitting dead in the garage, this repair is almost always worth doing before considering a replacement.