
How Variable Speed Lawn Mowers Work: A Complete Guide
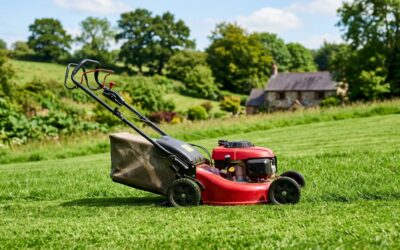
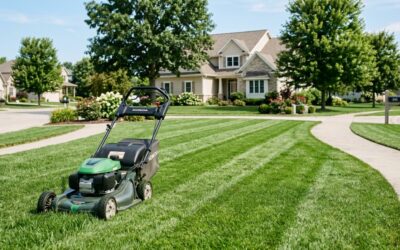
Variable speed lawn mowers let you control wheel drive speed independently from blade speed, giving you precise control over cutting pace. This matters because uneven terrain, wet grass, and tight corners all demand different walking speeds — and matching your pace to conditions produces a cleaner, safer cut.
###🔧 Expert Summary
- Variable speed lawn mowers use a continuously variable transmission (CVT) or cable-driven friction disc system to let operators adjust ground speed without changing engine RPM.
- Speed control is typically handled by a bail lever, thumb lever, or drive cable that modulates how much power transfers from the engine to the rear or all-wheel drive system.
- Most self-propelled variable speed mowers offer a range of 0–4 mph ground speed, allowing adaptation to slopes, thick grass, and landscaping obstacles.
- What does variable speed in lawn mowers mean in practice: the blade always spins at full engine speed while only the drive wheels change pace — these are two independent systems.
- Variable speed drive reduces operator fatigue by up to 30–40% compared to push mowers on large or hilly lawns, according to manufacturer ergonomic testing from brands like Honda and Toro.
Step1: Understand the Core Mechanism Behind Variable Speed Control
Variable speed in a lawn mower separates drive wheel speed from engine speed. Unlike a fixed-speed self-propelled mower that runs at one set pace, a variable speed system lets you squeeze a lever harder or softer to go faster or slower on demand.
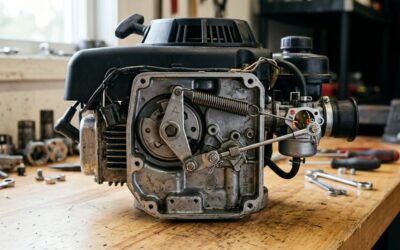
The engine crankshaft spins at a constant RPM (typically 2,800–3,200 RPM for cutting power). A separate transmission or drive system takes that rotation and converts it into wheel movement — at whatever speed you dial in.
There are three main mechanical systems used to achieve this. Each works differently, and knowing which one your mower uses tells you a lot about performance and maintenance.
Step 1A: Identify Which Variable Speed System Your Mower Uses
Three technologies dominate the market. Here’s how to tell them apart:
| Drive System | How It Works | Common Brands | Best For |
|---|---|---|---|
| Friction Disc / Cone Drive | A spinning disc presses against a rubber wheel; cable shifts contact point to change speed | Toro, Craftsman, Husqvarna | Budget to mid-range mowers |
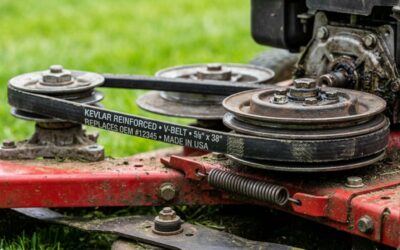
| CVT (Continuously Variable Transmission) | Belt-and-pulley system varies diameter ratio to change output speed smoothly | Honda (HRX series), Ego | Premium mowers, all-terrain use |
| Dual-Speed / Gear Drive | Fixed gear ratios (e.g., 3-speed) selected by lever; not truly continuous | Troy-Bilt, Snapper | Entry-level self-propelled |
| Electric Hub Motor (Cordless) | Battery-powered wheel motors modulate speed via PWM (pulse-width modulation) | Ego, Greenworks, Ryobi | Battery mowers, quiet operation |
Check your owner’s manual under “drive system” or look at the underside of the mower deck near the rear axle to identify which type you have.
What this means for you is that friction disc systems need periodic rubber pad replacement (every 2–3 seasons), while CVT belts are more durable but more expensive to fix when they do wear out.
Step 2: Follow How the Drive Cable Transfers Your Input to the Wheels
When you squeeze the speed control lever, you’re pulling a drive cable that physically engages or modulates the transmission. This is the most direct mechanical link between your hand and the mower’s ground speed.
Here’s the sequence of events from lever to wheel:
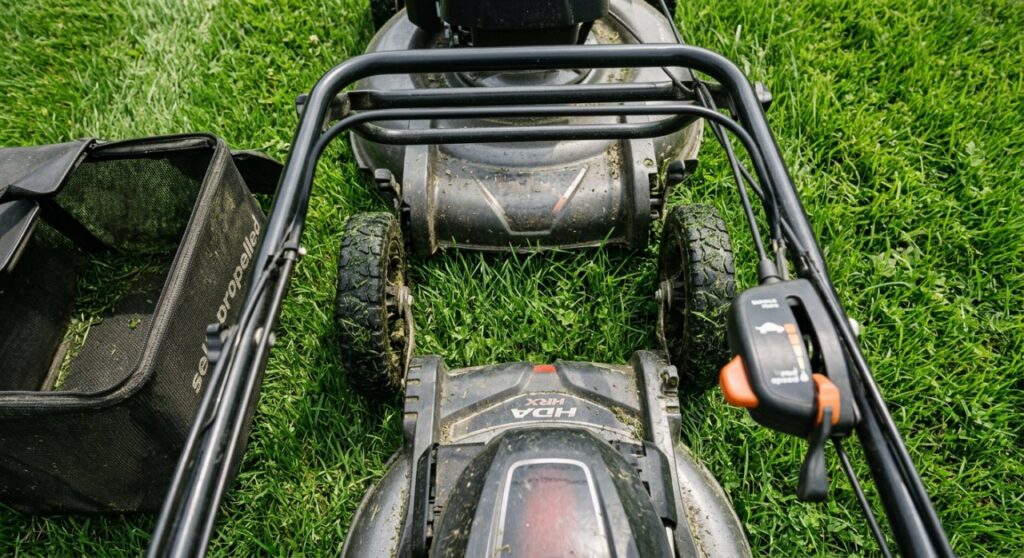
- You squeeze the operator presence bail — this is the large bar you hold against the handle. It must be held down for safety; releasing it kills drive and often the engine.
- You press the speed lever (thumb lever, variable bail, or single-lever system depending on brand). This pulls the inner drive cable tighter.
- The cable pulls a tension arm inside the drive housing, pressing the friction disc harder against the driven wheel — or adjusting belt tension in a CVT system.
- Greater cable tension = more contact = faster wheel speed. Back off the lever and the contact reduces, slowing the wheels.
- The rear wheels turn at your chosen speed while the blade deck continues spinning at full engine RPM.
Step 2A: Trace the Cable Path on Your Mower
Locate the drive cable by following it from the handle bail down to the transmission housing above the rear axle. Look for:
- A sheath (outer cable housing) running along the handle frame
- An inner wire that moves when you squeeze the lever
- A cable adjustment barrel near the transmission — this is your tuning point if the mower feels slugish or won’t disengage
Pro Tip: If your variable speed feels “on/off” rather than smooth, the cable adjuster has usually loosened. Turn the barrel clockwise by half-turn increments until smooth modulation returns.
Step 3: Understand How Engine Speed and Blade Speed Stay Independent
The blade and the drive wheels are powered by separate pathways from the same engine. This is the key insight most people miss.
The engine crankshaft drives two things simultaneously:
- The blade: directly via the crankshaft or a short blade drive belt — always at full RPM when engaged
- The transmission: via a separate drive belt to the rear-axle transmission — at a speed you control
This means you can be moving very slowly up a steep slope (low lever pressure) while the blade still spins at full speed for a clean cut. Or you can walk fast on flat ground without “over-speding” the blade.
Step 3A: Why This Matters on Hills and Thick Grass
On a steep incline (15° or more), best practice is:
- Reduce drive speed to 50–60% of maximum for better traction
- Keep blade engagement full (throttle at full/fast position)
- Never mow across steep slopes on a self-propelled mower — always mow up and down
In thick or wet grass, slow the drive speed so the blade has more time per square inch of grass. Rushing through heavy growth causes clumping, clogging, and an uneven cut.
What this means for you is that independently controlling wheel speed without touching blade speed is what separates a variable speed mower from both push mowers and simple fixed-speed self-propelled models.
Step 4: Learn to Operate Variable Speed Controls Correctly
Using the system correctly extends drive component life and gives you a better cut. Here’s the optimal operating sequence:
Numbered Operating Steps
- Start the engine with the drive lever fully released. Never engage drive before the engine reaches operating RPM.
- Set throttle to “Fast” (full RPM) before engaging blade. Running the blade at low throttle strains the spindle bearings.
- Engage the blade using the blade bail or blade engage lever.
- Squeeze the drive speed lever gently to begin moving. Start at 30–40% lever pressure on first use to feel the engagement point.
- Increase lever pressure progressively on open, flat ground. Back off at corners, obstacles, or when terrain changes.
- Release the drive lever before turning. Pulling a self-propelled mower into a tight turn while drive is engaged tears up turf and strains the transmission.
- Release the blade bail first when stopping, then the drive, then let the engine idle down before shuting off.
Step 4A: Match Speed to Conditions
| Condition | Recommended Speed Setting | Lever Pressure (Approx.) |
|---|---|---|
| Flat, dry, short grass | Maximum drive speed | Full pressure |
| Thick or tall grass | Slow–medium | 30–50% |
| Wet grass | Slow | 25–40% |
| Slopes up to 15° | Medium | 50–60% |
| Slopes 15–20° | Slow | 30–40% |
| Around obstacles / edging | Very slow | 20–30% |
| Final striping pass | Medium–fast | 60–80% |
What this means for you is that the most common mistake — running full speed through every condition — is exactly what causes premature friction disc wear and poor cut quality in variable speed mowers.
Step 5: Maintain the Variable Speed Drive System Properly
A variable speed drive system needs three types of attention: cable adjustment, friction component inspection, and belt tension checks. Neglect any one of these and you’ll lose smooth speed control.
Tools and Materials Needed
| Item | Purpose | Approximate Cost |
|---|---|---|
| Flathead and Phillips screwdrivers | Access drive housing panels | — |
| Needle-nose pliers | Cable adjustment and routing | — |
| Cable adjusting wrench or fingers | Barrel adjuster tuning | — |
| Replacement friction disc pad | Worn pad replacement | $8–$20 |
| OEM or compatible drive belt | Belt replacement when slipping | $15–$35 |
| White lithium grease | Cable sheath and pivot lubrication | $6–$12 |
| Owner’s manual | Correct torque specs and part numbers | Free download |
Step 5A: Adjust the Drive Cable
- Locate the barrel adjuster where the cable meets the transmission housing.
- Loosen the lock nut (if present) counterclockwise.
- Turn the barrel adjuster counterclockwise to tighten cable tension (increases drive engagement responsiveness).
- Test by slowly squeezing the lever — wheels should begin turning smoothly at about 30% lever travel.
- Tighten lock nut once adjustment is correct.
Step 5B: Inspect and Replace the Friction Disc
Friction disc pads are the most common wear item in cone/disc drive systems.
Signs of worn friction disc:
- Mower moves only at full lever pressure
- Drive slips on slight inclines
- Squealing or grinding when drive is engaged
- Visible flat spot or glazing on the rubber pad
To replace:
- Remove the rear wheel on the drive side (usually held by a snap ring or cotter pin)
- Access the drive housing cover (2–4 screws)
- Note the orientation of the friction disc assembly
- Remove the old pad, install the new one
- Reassemble and test cable tension
Pro Tip: Apply no lubricant to friction disc surfaces. Any grease or oil contamination on the disc pad or cone wheel causes immediate drive slip and requires cleaning with brake cleaner before operation.
Step 5C: Check Drive Belt Condition (CVT-Type Mowers)
For CVT-equipped mowers like the Honda HRX217 or Ego LM2135SP:
- Remove the belt cover (underside or side panel per model)
- Look for cracks, fraying, glazing, or uneven width
- Check puley groves for debris buildup
- A belt that’s more than 3 seasons old should be replaced proactively, even if it looks acceptable
What this means for you is that $20spent on a new friction pad or $30 on a drive belt saves you from a $150+ drive system rebuild — and most owners can complete both jobs in under45 minutes.
Step 6: Troubleshoot Common Variable Speed Problems
Most variable speed issues trace back to three causes: cable stretch, worn friction components, or belt slip. Here’s a direct diagnostic table:
| Symptom | Most Likely Cause | Fix |
|---|---|---|
| Mower won’t self-propel at all | Cable broken or fully loose | Adjust or replace cable |
| Drive only works at full lever pressure | Friction pad glazed or worn | Clean replace friction disc |
| Drive jerks rather than moving smoothly | Cable kinking in sheath | Lubricate or reroute cable |
| Mower creps forward without touching lever | Cable too tight / misadjusted | Back off barrel adjuster |
| Speed feels the same regardless of lever position | CVT belt worn / puley seized | Replace belt, inspect pulleys |
| Drive slips on hills but works on flat | Friction pad worn below40% | Replace friction disc pad |
| Burning smell from rear of mower | Belt slipping on seized pulley | Inspect and free puley, replace belt |
Pro Tip: Before assuming a mechanical failure, always check that the operator presence bail makes full contact with the upper handle bar. A bent bail spring prevents the system from engaging at all, and it costs nothing to diagnose.
How Variable Speed Compares to Fixed-Speed Self-Propelled Mowers
Variable speed mowers cost more upfront but deliver measurably better results across uneven terrain and mixed lawn conditions. Here’s the direct comparison:
| Feature | Variable Speed | Fixed Speed Self-Propelled | Push Mower |
|---|---|---|---|
| Speed control | Continuous (0–4 mph typical) | 1or 2 preset speeds | User walking pace |
| Hill performance | Excellent | Fair | Operator-dependent |
| Thick grass handling | Very Good (slow down on demand) | Limited | Poor |
| Operator fatigue | Low–Moderate | High | |
| Drive maintenance cost | Moderate (cable, pad, belt) | Low | None |
| Price range | $350–$800+ | $250–$450 | $150–$350 |
| Best for | Varied terrain, 1/4+ acre | Flat lawns, consistent grass | Small, flat lawns under 1/4 acre |
| Top brands | Honda HRX, Toro 60V, Ego SP | Troy-Bilt TB240, Husqvarna LC221A | Fiskars, Craftsman M105 |
What this means for you is that if your lawn has any slope, thick grass sections, or is larger than a quarter acre, variable speed pays for itself in reduced fatigue and better cut quality within the first season.
Pro Tips From the Test Bench
- Don’t hold the speed lever at partial pressure for extended periods on friction disc mowers — sustained slipping generates heat and glazes the pad faster than any other use pattern.
- On electric/battery variable speed mowers, the speed controller is software-based. If response feels delayed or sluggish, check for firmware updates (Ego and Greenworks both release these via their apps).
- Bi-weekly cable lubrication with white lithium grease extends cable life from 2–3 seasons to 5+ seasons on high-use mowers.
- The Honda Hydrostatic Drive (found in HRX217 series) uses oil-filled hydrostatic transmission rather than belt/disc — essentially no friction components to wear, but requires hydrostatic fluid checks every 2 years.
- Mow in overlapping passes at moderate speed rather than fast single passes. At full drive speed, deck turbulence reduces on a typical 21″ deck, causing missed grass strands along pass edges.
Common Mistakes to Avoid
-❌ Engaging drive before engine reaches full RPM — this stresses the drive cable and friction components at every start
- ❌ Turning sharply with drive fully engaged — tears turf and bends the friction disc arm on cone drive systems
- ❌ Lubrication friction disc surfaces — any oil or grease on contact surfaces destroys drive traction immediately
- ❌ Ignoring cable fraying — a snapped drive cable mid-mow requires full cable replacement; a fraying cable costs $12to fix
- ❌ Running at high speed in reverse — most self-propelled mowers are not designed for powered reverse; forcing it damages the axle engagement mechanism
- ❌ Skipping seasonal belt/cable inspection — the majority of in-season drive failures are 100% preventable with a10-minute spring inspection
Frequently Asked Questions
What does variable speed mean on a lawn mower?
Variable speed on a lawn mower means the drive wheel speed can be continuously adjusted by the operator — typically from 0 to 4 mph — without changing engine speed or blade RPM. The blade always runs at full power while the wheel speed is controlled separately by a hand lever.
Is variable speed worth the extra cost on a lawn mower?
Yes, for lawns larger than 1/4 acre or with any slope. Variable speed mowers reduce operator fatigue significantly, produce a cleaner cut in varying grass conditions, and pay back their price premium within one to two seasons of regular use compared to fixed-speed or push alternatives.
How long does a variable speed drive system last?
With proper maintenance, the drive cable lasts 4–6 seasons, friction disc pads last 2–3 seasons, and CVT belts last 3–5 seasons. Hydrostatic drives on premium mowers like the Honda HRX series can last 10+ years with biennial fluid checks.
Can I adjust the maximum speed on a variable speed mower?
On most cable-driven systems, the cable adjuster barrel sets the engagement point but not the maximum speed — maximum speed is fixed by the transmission gear ratio. Some battery-powered mowers (Ego, Greenworks) allow maximum speed limiting via companion apps, a feature useful for training new operators.
Why does my variable speed mower move at only one speed now?
If your mower has lost variable control and runs at one fixed speed (or not at all), the most likely cause is a worn friction disc pad (glazed flat) or a stretched/kinked drive cable. Check the cable adjuster first — a five-minute cable adjustment fixes this in roughly 60% of cases before any parts replacement is needed.
Conclusion
Variable speed lawn mowers work by separating wheel drive speed from engine and blade speed, using a friction disc, CVT belt, or electric hub motor system controlled by a hand-operated cable lever. The blade always runs at full RPM for a clean cut, while you dial in exactly how fast the mower walks to match your terrain, grass thickness, and stamina.
The key maintenance items — cable tension, friction pad condition, and belt integrity — are all owner-serviceable for under $35in parts and 45 minutes of time. Addressing them seasonally prevents the vast majority of drive system failures.
Ready to get the most from your mower? Download your model’s service manual, pick up a cable adjuster wrench, and do a 10-minute spring inspection before your first cut of the season. Your back, your lawn, and your transmission will all benefit.