

—
How to Swap Pulleys on Lawn Mowers
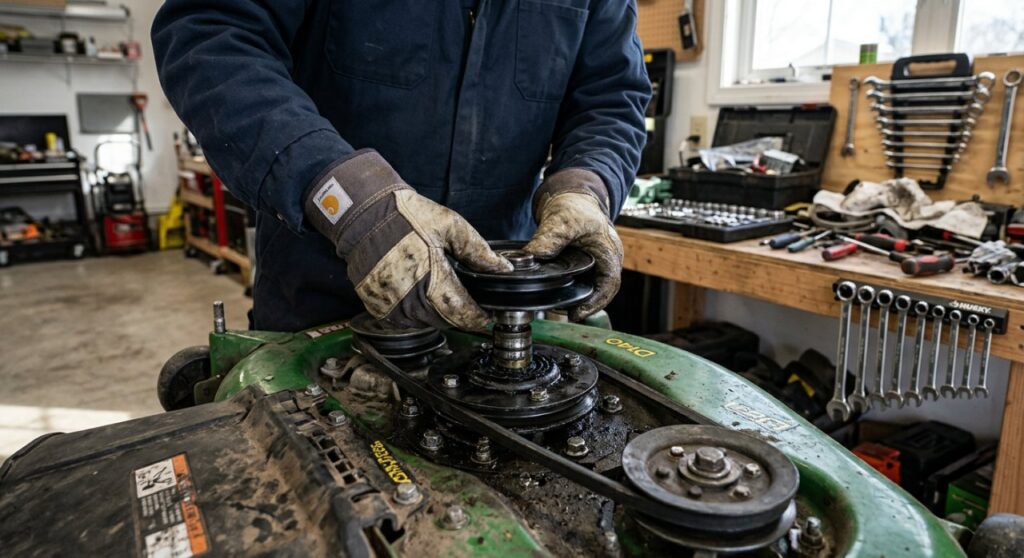
Swapping pulleys on a lawn mower is the process of replacing the existing pulley with a different size to alter the blade speed or engine load. This modification is commonly performed to increase cutting performance or adapt the mower for a specific task, but it requires careful selection and precise installation to avoid damage.
Expert Summary
- Pulley swaps are not universal. Compatibility depends on the mower’s brand, deck configuration, and engine type. Always verify part numbers before purchasing.
- The primary goal is to change blade tip speed. A smaller engine pulley or larger deck pulley increases blade speed for finer mulching, while the opposite reduces strain for heavy, wet grass.
- Safety is non-negotiable. The engine must be off, spark plug disconnected, and the battery potentially removed to prevent accidental startup during the procedure.
- Belt alignment is critical. Incorrect pulley alignment causes immediate belt wear, vibration, and potential failure.
- Tools like a pulley puller are often essential. Many pulleys are press-fitted onto shafts and cannot be removed by hand.
What Lawn Mowers Can You Pulley Swap?
You can perform a pulley swap on most riding lawn mowers and zero-turn mowers with a belt-driven cutting deck. This includes popular brands like John Deere, Husqvarna, Cub Cadet, and Toro. The feasibility depends on the availability of aftermarket or OEM pulleys with different diameters that fit your specific deck spindle and engine crankshaft.
Pulley swaps are generally not possible or practical on:
- Most push reel mowers.
- Electric or battery-powered mowers with direct-drive blades.
- Mowers with hydrostatic transmissions that are integrated with the deck drive system in a non-modular way.
Tools and Materials Needed
Gather all necessary items before starting to ensure a smooth and safe process.
| Tool / Material | Purpose |
|---|---|
| Socket/Wrench Set | To remove bolts securing the deck and pulley guards. |
| Pulley Puller Tool | To safely remove a press-fit pulley from a shaft without damage. |
| Adjustable Wrench or Belt Tensioner Tool | To relieve tension on the drive belt for removal. |
| New Pulley (Correct Size) | The replacement part; must match shaft diameter and keyway. |
| Safety Glasses & Gloves | To protect against debris and sharp edges. |
| Penetrating Oil (e.g., PB Blaster) | To loosen rusted or seized pulleys and bolts. |
| Torque Wrench | To tighten bolts to the manufacturer’s specified torque. |
Step-by-Step Guide to Swapping Pulleys on a Lawn Mower
Follow these steps methodically for a successful pulley swap.
Step 1: Prepare the Mower and Workspace
Disconnect all power sources to ensure the mower cannot start accidentally. Park on a flat, level surface. For gas mowers, remove the spark plug wire. For all mowers, disconnect the negative battery terminal if accessible.
Step 2: Remove the Cutting Deck
Access the deck removal points. Most riding mowers have a deck lift lever or height adjustment pins. Lower the deck to its lowest position, then consult your owner’s manual to locate and disconnect the deck engagement cable, drive belt, and any linkage pins holding the deck to the frame. Slide the deck out from under the mower.
Step 3: Locate and Access the Pulleys
Identify the pulley you need to swap. The engine pulley is on the crankshaft below the engine. The deck pulleys are on the spindles that hold the blades. Remove any belt guards or covers using your socket set to expose the pulleys and belt routing.
Step 4: Remove the Old Pulley
Relieve all belt tension. Use your wrench on the belt tensioner pulley to create slack, then slip the belt off the pulley you are replacing. If the pulley is secured with a center bolt, remove it. For a press-fit pulley, attach the pulley puller tool according to its instructions and carefully extract the pulley from the shaft. Apply penetrating oil if it is stuck.
Step 5: Install the New Pulley
Clean the shaft thoroughly to remove rust or debris. Align the keyway (a small slot) on the shaft with the corresponding slot on the new pulley. Slide the new pulley onto the shaft. Reinstall the center bolt and tighten it to the manufacturer’s torque specification (typically 30-50 ft-lbs for deck pulleys).
Step 6: Reassemble and Re-tension
Re-route the belt exactly as shown in your manual’s diagram. This is critical for proper operation. Re-engage the belt tensioner to apply proper tension. Reinstall all belt guards and the cutting deck, reconnecting all linkages, cables, and pins.
Step 7: Final Checks and Test
Double-check all connections and ensure the belt is seated properly in all pulley grooves. Reconnect the spark plug wire and battery. Start the mower and engage the blades (on a safe, clear surface) to listen for unusual noises or vibrations. Check for proper blade engagement and smooth operation.
Pro Tips for a Successful Pulley Swap
- Take photos before disassembly, especially of the belt routing and linkage connections.
- Use a marker to mark the belt’s path on the deck before removal if a diagram isn’t available.
- Inspect the old belt for wear while it’s off. Now is the ideal time to replace a worn belt.
- Consider a kit. Some aftermarket companies sell complete pulley and belt kits designed for specific performance upgrades, ensuring all parts are compatible.
Common Mistakes to Avoid
- Ignoring the keyway. Forcing a pulley onto a shaft without aligning the keyway will shear the key and damage the shaft.
- Incorrect belt routing. An improperly routed belt will slip, squeal, or fly off immediately upon engagement.
- Over-torquing bolts. This can strip threads or crack the pulley. Always use a torque wrench.
- Skipping the manual. Assumptions about deck removal or belt routing lead to frustration and errors. Your model-specific manual is the ultimate guide.
Frequently Asked Questions (FAQ)
Q: Will changing pulleys make my mower cut better?
A: Yes, but specifically for mulching. Increasing blade speed (via a smaller engine pulley or larger deck pulley) creates finer clippings, improving mulch decomposition. It does not increase torque for thick grass.
Q: Can I use pulleys from a different mower brand?
A: Only if the critical specifications match: shaft diameter, keyway size, and bolt pattern. It is safest to use OEM or confirmed-compatible aftermarket parts for your specific model.
Q: How do I know what size pulley to buy?
A: Measure the outer diameter of your existing pulley. Consult your mower’s service manual or a reputable parts dealer. Performance pulley kits will list the intended speed increase percentage.
Q: Is swapping pulleys hard?
A: The difficulty is moderate. The main challenges are removing a stuck pulley (requiring a puller tool) and correctly reinstalling the deck with proper belt tension. Following the steps carefully makes it manageable for a DIYer with basic mechanical skills.
Q: What happens if I use the wrong size pulley?
A: It can cause the belt to slip, wear prematurely, or come off. It may also over-speed the blades, causing excessive vibration, or overload the engine, leading to overheating and potential damage.
Conclusion
Swapping pulleys on a lawn mower is a practical modification that can tailor your machine’s performance to your yard’s needs. By following this step-by-step guide, prioritizing safety, and using the correct tools and parts, you can execute the swap effectively. Remember to always consult your owner’s manual for model-specific instructions and torque specifications. If you’re unsure about compatibility or the procedure, consulting a small engine mechanic is a wise investment to protect your equipment.