
What Is a Stripe Kit for Lawn Mowers? The Complete Power-User Guide
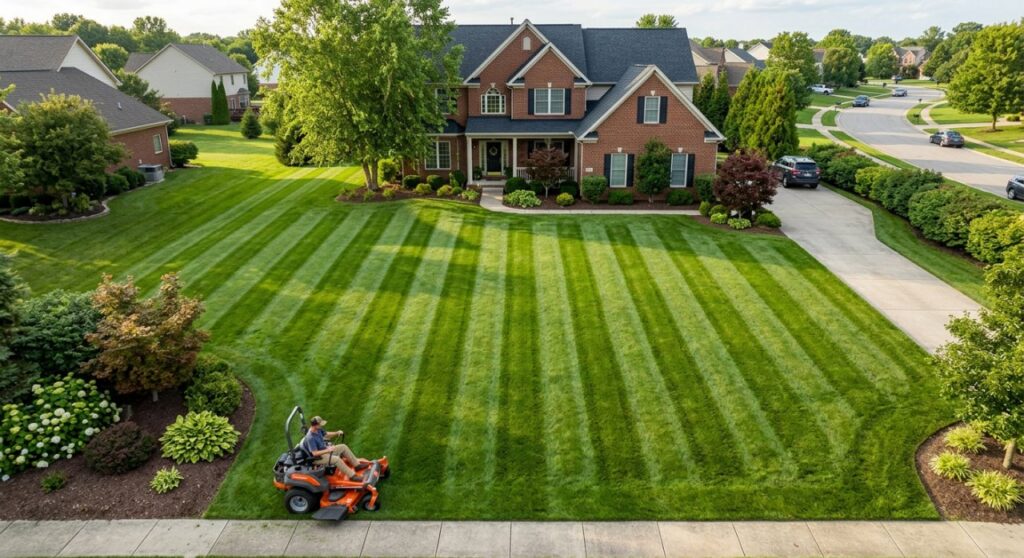
A stripe kit is a rear-mounted attachment that bends grass blades in alternating directions as you mow, creating the high-contrast light-and-dark striped patterns seen on professional sports fields and golf courses. Without one, most mowers leave flat, undirected turf that produces no visible stripe definition.
Expert Summary
- A lawn mower stripe kit does not dye or cut grass differently — it creates visual contrast purely by controlling the angle of grass blade deflection, which changes how sunlight reflects off the turf.
- The three main stripe kit types are rollers, flap/fin kits, and brush kits, each producing different stripe sharpness and suiting different grass types.
- Cool-season grasses (tall fescue, Kentucky bluegrass, ryegrass) stripe more visibly than warm-season varieties due to longer, more flexible blade structure.
- Most stripe kits are mower-brand-specific or deck-width-specific — a 42-inch deck kit will not fit a 54-inch deck without modification.
- For power users: a roller-style stripe kit consistently outperforms flap kits in stripe definition, durability, and consistency across turf conditions.
Step 1: Understand the Mechanism Behind Lawn Striping
Grass striping is a physics problem, not a chemistry one. Light stripes appear where grass blades are bent toward you (reflecting sunlight back at the viewer), and dark stripes appear where blades are bent away.
A stripe kit amplifies this effect by applying consistent downward pressure on blades as the mower passes, holding them at a more extreme angle than the mower deck alone achieves. The deeper the deflection angle and the longer the grass blade, the sharper the contrast.
1 Why Your Mower Deck Alone Isn’t Enough
Most mower decks create mild striping just from the air turbulence of the cutting blades. This fades within 24–48 hours as grass recovers its upright position.
A dedicated stripe kit maintains blade deflection longer — often until the next mowing — because it applies mechanical pressure rather than just airflow. Roller kits are especially effective because they combine weight (rolling pressure) with a continuous contact surface.
Step 2: Identify the Three Core Stripe Kit Types
| Kit Type | Mechanism | Stripe Sharpness | Best For | Durability |
|---|---|---|---|---|
| Roller Kit | Heavy polyurethane or steel drum rolls over blades post-cut | Excellent | All grass types, cool-season especially | Very High |
| Flap/Fin Kit | Flexible rubber flap drags across turf behind deck | Good | Shorter, dense turf | Medium |
| Brush Kit | Stiff bristle array combs blades in one direction | Moderate | Fine-blade grasses | Medium-Low |
1 Roller Kits
Roller kits are the gold standard for stripe definition. Products like the Toro TimeCutter Striping Roller or Husqvarna OEM stripe kits use a weighted polyurethane drum that sits just behind the cutting deck.
Weight matters: heavier rollers produce more defined stripes on thick turf. Expect 15–30 lbs on quality units.
2 Flap/Fin Kits
Flap kits use one or more flexible rubber or plastic fins that drag behind the deck. They’re cheaper ($30–$80 vs. $80–$250 for rollers) and easier to install, but the stripe fades faster.
BigLawn and Qwikchute make aftermarket flap-style kits compatible with most 42″–54″ decks. If your mow pattern is frequent (every 5–6 days), flap kits are a reasonable compromise.
3 Brush Kits
Brush kits are niche products, mostly suited for fine fescue or bentgrass where blade combing matters more than heavy rolling. They degrade faster than rubber or steel alternatives and aren’t recommended for lawns with debris or thatch buildup.
Step 3: Match the Kit to Your Mower Type
Not all stripe kits are universal. Compatibility is determined by mower deck width, mower category, and attachment mounting system.
1 Zero-Turn Mowers (ZTR)
Zero-turn mowers are the most popular platform for stripe kits because their turning pattern produces clean lines. OEM kits from Husqvarna, Scag, Ferris, and Gravely are deck-specific and mount via integrated brackets.
Aftermarket options like Jungle Jim’s Stripe King and Stripe-It kits work across multiple ZTR brands and use universal mounting arms. Verify the deck discharge side clearance — some ZTR decks have side-discharge shrouds that block rear-mount brackets.
2 Riding Tractors (Rear-Engine and Front-Engine)
Riding tractors produce less defined stripes than ZTRs because the rear wheel tracks often disturb the pattern mid-pass. Roller kits for tractors need to span the full deck width — leaving a gap creates visible skip lines.
John Deere’s MowerPlus Stripe Kit and Cub Cadet’s OEM roller both mount directly to deck rear hangers and are the cleanest options for their respective platforms.
3 Walk-Behind Mowers
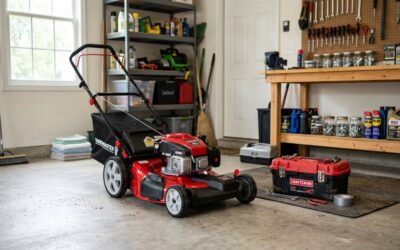
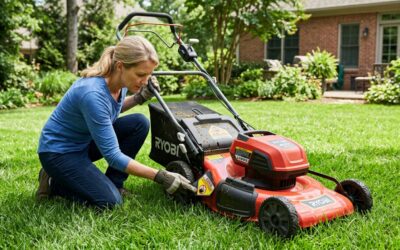
Walk-behind stripe kits exist but are less common. Toro’s Recycler and Personal Pace series both have OEM roller kits. For commercial walk-behinds (Exmark, Wright, Toro Commercial), aftermarket roller assemblies are available through dealers.
The physics works the same — but on a 21″ deck, stripe width is narrower, requiring more passes to produce the same visual impact as a 52″+ ZTR.
Step 4: Select the Right Kit for Your Grass Type and Budget
Grass biology directly affects which kit is worth buying. Cool-season grasses respond most dramatically to stripe kits. Warm-season grasses (Bermuda, Zoysia, St. Augustine) have stiffer, shorter blades that recover upright faster — stripes still form but fade within hours.
Tools and Materials Needed
| Item | Purpose |
|---|---|
| Stripe kit (roller, flap, or brush) | Primary striping attachment |
| Socket set (3/8″ and 1/2″ drive) | Mounting hardware installation |
| Torque wrench | Ensuring correct bolt torque to spec |
| Jack stands or mower lift | Safe access to rear deck mount points |
| Threadlocker (Loctite Blue 243) | Preventing vibration-induced bolt loosening |
| Measuring tape | Verifying full-deck-width coverage |
1 Budget Brackets
| Budget | Recommended Choice | Expected Stripe Quality |
|---|---|---|
| Under $50 | Rubber flap kit (aftermarket) | Moderate, fades in 1–2 days |
| $50–$120 | Mid-range roller (BigLawn, Stripe-It) | Good, lasts 3–5 days |
| $120–$250 | OEM roller kit for your specific mower | Excellent, 5–7 day retention |
| $250+ | Heavy commercial roller (Scag, Exmark OEM) | Professional-grade, 7+ days |
Step 5: Install the Stripe Kit Correctly
Incorrect installation is the most common reason stripe kits underperform. Most issues trace back to improper roller height, off-center mounting, or insufficient blade clearance.
1 Set the Correct Roller Height
The roller should lightly contact the turf at your normal mowing height — not be suspended above it. Start by lowering it until it just touches grass on a flat surface, then raise 1/8″ to 1/4″ to avoid scalping on undulating terrain.
Too low causes turf scalp marks and excessive roller wear. Too high produces no stripe effect. This adjustment is the single most impactful setup variable.
2 Center the Kit to the Deck
Use a measuring tape to verify the roller or flap assembly is centered behind the cutting deck. An off-center mount creates asymmetric stripe widths and uneven wear on the roller bearings.
On roller kits with adjustable brackets, snug — but don’t fully torque — the hardware until you’ve confirmed center alignment.
3 Apply Threadlocker to All Mounting Bolts
Mower decks vibrate aggressively. Without Loctite Blue 243 on mounting hardware, bolts back out within a few mowing sessions. Apply to threads before final torque, following the kit’s specified torque value (typically 18–25 ft-lbs for M8 hardware).
4 Test on a Short Pass Before Full Use
Make one 30-foot pass on your lawn and stop to inspect. Check for turf scalping, uneven stripe width, and any unusual scraping sounds. Adjust roller height if you see scalp marks or no visible stripe.
Step 6: Use Proper Mowing Patterns to Maximize Stripe Visibility
Stripe quality is 50% equipment and 50% technique. The sharpest stripes come from straight, consistent passes with clean turns that don’t drag across the pattern.
1 Mow at the Correct Height
Stripe kits work best on grass cut at 3–4 inches. Shorter cuts leave less blade surface area to deflect, reducing contrast. Taller grass holds the deflection angle longer after mowing.
Never cut more than one-third of the blade height per session — weak, stress-cut grass recovers upright faster and blurs the stripe definition.
2 Alternate Directions Each Mow
Mowing in the same direction each pass causes grass to permanently lean one way, eventually creating ruts and turf stress. Alternate your stripe direction by 90° or 180° each session. This also produces the checkerboard and diamond patterns seen on professional fields.
3 Execute Clean Headland Turns
At the end of each pass, turn on pavement or in a headland strip rather than pivoting directly on your pattern. Zero-turn mowers that spin in place on the striped section create scuff marks that break up the pattern.
Pro Tips for Maximum Stripe Performance
- Mow in the morning or evening when angled sunlight increases contrast between bent and upright blades. Midday overhead sun flattens perceived stripe depth.
- Keep mower blades sharp. Dull blades shred grass tips, making blades flop irregularly rather than deflecting cleanly — which blurs stripe edges.
- Water your lawn the day before mowing if the turf is drought-stressed and standing upright stiffly. Slightly hydrated grass is more pliable and holds deflection better.
- Add weight to lightweight rollers by filling hollow polyurethane rollers with sand. Several Jungle Jim’s and BigLawn models support this modification, effectively converting a budget roller into a near-commercial-weight unit.
- On warm-season grass, mow more frequently (every 5 days) and at maximum height to maximize the brief stripe window before blades recover.
Common Mistakes to Avoid
- Buying a universal kit that doesn’t span your deck width. A roller that’s 2–3 inches narrower than your deck leaves unstriped gaps at both ends. Always measure and verify coverage before purchasing.
- Setting roller height too low on bumpy lawns. A roller contacting every inch of uneven terrain causes inconsistent stripe pressure and visible scalp marks. On undulating lawns, raise the roller slightly and accept slightly reduced stripe intensity.
- Using a stripe kit on dormant or recently overseeded turf. Mechanical pressure from a roller during dormancy or early germination can damage crowns and root zones. Wait until grass is actively growing and at full mowing height.
- Ignoring OEM bracket compatibility. Some mowers have specific attachment points for deck accessories, and universal mounting arms don’t always clear discharge chutes, anti-scalp rollers, or rear discharge covers cleanly.
- Expecting the same results across all grass species. If you’ve just laid Bermuda sod and expected Kentucky Bluegrass-style stripes, you’ll be disappointed. Set expectations before purchase based on your grass type.
FAQ
Q: Do stripe kits damage grass?
No, when installed and adjusted correctly, stripe kits do not damage healthy, actively growing turf. The bending is temporary and grass recovers fully between mowing sessions. Damage can occur if the roller is set too low and scalps on high spots, or if used on dormant or drought-stressed turf.
Q: Can I add a stripe kit to any lawn mower?
Most riding mowers and zero-turn mowers can accept a stripe kit, but compatibility varies by deck width, attachment mounting design, and mower brand. Walk-behind mowers can use stripe kits but are less common. Always check manufacturer compatibility before purchasing.
Q: How long do lawn stripes last after mowing?
With a quality roller kit on cool-season grass at 3–4 inches, stripes typically remain visible for 5–7 days. Flap kits on the same turf produce stripes lasting 2–4 days. Warm-season grasses fade in 12–48 hours regardless of kit type.
Q: What’s the difference between OEM and aftermarket stripe kits?
OEM kits are engineered for specific mower models — they fit precisely, use correct bracket geometry, and typically carry a manufacturer warranty. Aftermarket kits offer broader compatibility at lower cost but may require modification or shimming for a clean fit. For high-use commercial mowing, OEM is worth the premium.
Q: Do I need a stripe kit, or can I stripe without one?
You can achieve light striping without a kit by overlapping passes carefully, but the results are significantly less defined and fade within 24 hours. A dedicated stripe kit produces 3–5× more visible contrast and dramatically longer stripe retention.
The Purchase Decision: Is a Stripe Kit Worth Buying for Your Setup?
This is where budget and grass reality converge. Here’s a direct breakdown by user type:
If you have a ZTR with a 48″–61″ deck and cool-season grass: A mid-range to premium roller kit is unambiguously worth buying. Budget $100–$200 for an OEM or quality aftermarket roller. The visual result-to-cost ratio is excellent. Skip flap kits at this level — the difference in stripe quality is significant.
If you have a riding tractor and warm-season grass: The ROI drops sharply. Warm-season stripe fade is fast, and riding tractor patterns are less clean than ZTR patterns. A $40–$60 flap kit is the ceiling worth spending — a premium roller won’t produce meaningfully better results on Bermuda or Zoysia.
If you have a walk-behind mower: Stripe kits work, but the visual impact requires many passes and careful alignment. For a small lawn (under 5,000 sq ft), the OEM walk-behind roller kit is reasonable. Above that size, consider upgrading to a small ZTR before investing in striping accessories.
Should you spend more? Commercial-grade roller kits over $250 are engineered for daily commercial use, not homeowner frequency. Unless you’re mowing professionally or have a large estate (1+ acre), there’s no performance gap that justifies the cost.
Should you spend less? Sub-$40 flap kits from unknown brands have inconsistent build quality and often fail at the bracket welds within a season. The $80–$120 tier (Jungle Jim’s, BigLawn, Stripe-It) is the practical entry point for anything that will last.
Conclusion
A stripe kit for lawn mowers is a straightforward mechanical attachment that transforms ordinary mowing into professional-looking patterned turf by controlling the angle of grass blade deflection. The right kit depends on your mower platform, deck width, grass species, and how much stripe retention you expect.
For most power users with cool-season turf and a ZTR or riding mower, a roller-style kit in the $100–$200 range represents the optimal purchase — enough performance to produce professional-grade patterns without commercial pricing. Match the kit to your deck width precisely, install with threadlocker, and set roller height before your first full mowing session.
Ready to stripe? Start with your mower’s OEM accessories page, verify deck compatibility, and check if a dedicated roller attachment is available before defaulting to a universal aftermarket option.