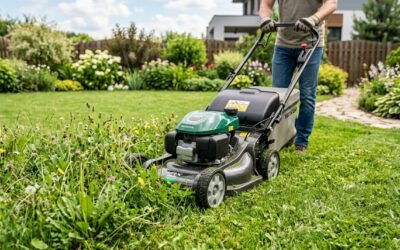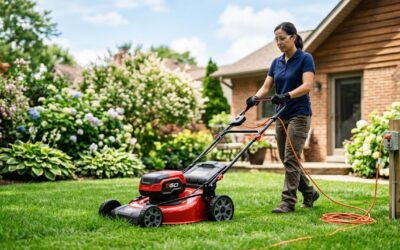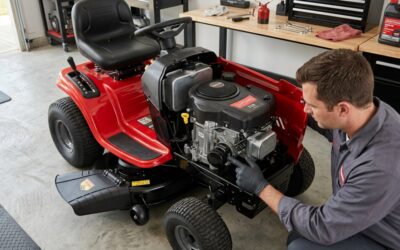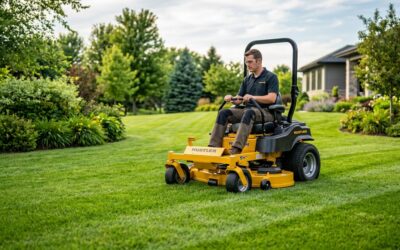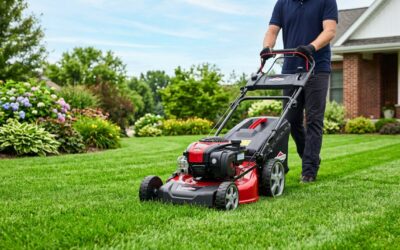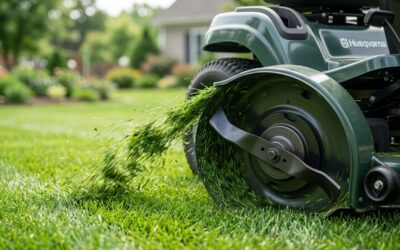

what is the cutting height of lawn mowers? Direct Answer
Cutting height is the distance between the soil surface and the mower blade’s cutting plane. Most residential lawn mowers can cut grass to approximately 1–4 inches (25–100 mm), although the usable range varies by mower design, grass species, terrain, and deck adjustment system.
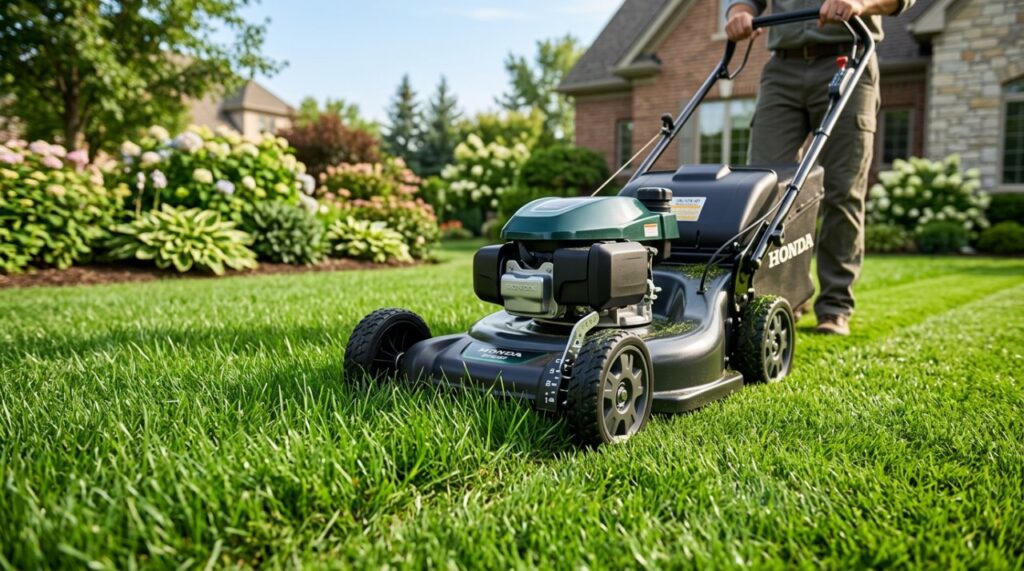
Choosing the correct setting helps grass retain enough leaf tissue for photosynthesis, root development, moisture retention, and weed suppression.
Expert Summary>
– Lawn mower cutting height measures how much grass remains after mowing, not how much the mower removes. – Most home lawns perform best between 2 and 4 inches, depending on grass species and growing conditions. – The lowest numbered deck setting does not always equal the manufacturer’s stated minimum cutting height. – Never remove more than one-third of the grass blade in a single mowing session. – Measure the finished lawn with a ruler because wheel position, tire pressure, thatch, and uneven ground can change the real result.
Tools and Materials Needed to Measure Lawn Mower Cutting Height
You need only basic measuring and adjustment tools. A ruler and the mower’s manual are usually enough, but a flat surface and tire-pressure gauge improve accuracy.
| Tool or material | Purpose | Essential? |
|---|---|---|
| Ruler or tape measure | Measures grass before and after mowing | Yes |
| Owner’s manual | Identifies the mower’s stated adjustment range | Recommended |
| Flat, hard surface | Helps check deck and blade position consistently | Recommended |
| Work gloves | Protects hands during inspections | Yes |
| Tire-pressure gauge | Detects uneven pneumatic tires | For applicable models |
| Spark-plug wrench | Disconnects or removes the spark plug safely | For petrol mowers |
| Blade-height gauge | Measures the blade cutting plane more precisely | Optional |
| Notebook or phone | Records the best setting for each season | Optional |
Safety warning: Never place your hands under a mower deck while the machine can start. Remove the battery or disconnect the spark-plug wire before inspecting the blade area.
Step 1: Understand What Lawn Mower Cutting Height Means
Define cutting height as the approximate vertical distance from the ground to the point where the blade cuts the grass. A setting of 3 inches, for example, should leave the grass close to 3 inches tall after mowing.
This measurement is not the height of the deck above the ground. It is also not the amount of grass removed.
Cutting height versus mowing depth
These terms describe different measurements:
- Cutting height: The grass height remaining after mowing.
- Amount removed: The difference between the grass height before and after mowing.
- Deck clearance: The space between the mower deck and the ground.
- Blade position: The height of the blade’s cutting edge relative to the surface.
If grass is 4.5 inches tall and the mower leaves it at 3 inches, the cutting height is 3 inches and the amount removed is 1.5 inches.
Why the actual result may differ from the mower setting
A mower label may show numbers such as 1–7 rather than inches or millimetres. These numbers normally represent adjustment positions, not guaranteed grass heights.
Actual cutting height can change because of:
- Uneven ground
- Soft or wet soil
- Thick thatch
- Worn wheel bushings
- Incorrect tire pressure
- Deck tilt
- Blade wear
- Grass bending under the deck
- Operator walking speed
- The mower’s weight sinking into soft turf
For that reason, the most reliable method is to mow a test strip and measure the grass that remains.
Step 2: Identify Your Mower’s Cutting-Height Range
Check the owner’s manual, deck label, or manufacturer’s specification sheet before changing the mower setting. Residential machines commonly cover approximately 1–4 inches, but mower type determines the practical range.
Typical cutting-height ranges by mower type
The following ranges are general reference points rather than universal specifications. Always verify the exact range for your mower.
| Mower type | Typical cutting-height range | Best suited to | Main limitation |
|---|---|---|---|
| Manual reel mower | 0.5–2.5 in. | Small, level, frequently cut lawns | Struggles with tall or coarse grass |
| Powered cylinder mower | 0.25–2 in. | Fine, level ornamental turf | Requires precise maintenance |
| Push rotary mower | 1–4 in. | Most residential lawns | Less precise at very low settings |
| Self-propelled rotary mower | 1–4 in. | Medium or sloped lawns | Higher purchase and repair cost |
| Battery mower | 1–4 in. | Small and medium home lawns | Runtime may limit large properties |
| Riding mower | 1–4.5 in. | Large lawns | Wide decks may scalp uneven ground |
| Robotic mower | 0.8–4 in. | Frequent automated trimming | Range varies substantially by model |
| Flail mower | 1–6 in. or more | Rough grass and overgrowth | Not intended for a fine lawn finish |
A mower with more adjustment positions is not automatically more accurate. The useful question is whether its range includes the correct height for your grass and whether the mechanism maintains that height consistently.
Understand numbered adjustment levers
Deck settings marked 1, 2, 3, 4, or 5 are usually relative positions. Setting 3 does not necessarily mean 3 inches.
To map the settings:
- Select a middle position.
- Mow a small test strip.
- Measure the grass in several places.
- Record the average height.
- Repeat at one higher and one lower position.
This creates a practical reference chart for your mower and lawn.
Step 3: Determine What Is the Lowest Cutting Height of Lawn Mowers
Expect the lowest practical cutting height to range from about 0.25 inch on specialised cylinder mowers to roughly 1 inch on many residential rotary mowers. The mower’s mechanical minimum is not necessarily a safe setting for your lawn.
Cylinder or reel blades can cut lower because they shear grass against a fixed bedknife. Rotary blades cut by impact and generally require more clearance to operate safely and cleanly.
Lowest cutting heights by mower design
| Mower design | Approximate low end | Is it suitable for a normal home lawn? |
|---|---|---|
| Golf-green cylinder mower | 0.1–0.25 in. | Usually no |
| Residential cylinder mower | 0.25–0.75 in. | Only for suitable fine turf |
| Manual reel mower | 0.5–1 in. | Sometimes |
| Rotary push mower | 0.75–1.25 in. | Rarely as a routine setting |
| Riding rotary mower | 1–1.5 in. | Usually too low for regular mowing |
| Robotic mower | 0.8–1.5 in. | Model- and grass-dependent |
These figures describe common equipment categories, not a promise for every machine. Blade design, wheel diameter, deck geometry, and manufacturer limits all affect the minimum.
Mechanical minimum versus agronomic minimum
The mechanical minimum is the lowest setting the mower can physically reach. The agronomic minimum is the lowest height the grass can tolerate without declining.
The agronomic minimum is usually more important. A mower may cut at 1 inch, but that does not mean a shade-grown lawn adapted to 3 inches should be mowed that low.
Why an extremely low cut can damage a lawn
Cutting below the grass’s tolerance may:
- Remove too much photosynthetic leaf tissue
- Expose stems, crowns, soil, or thatch
- Reduce root depth
- Increase soil temperature
- Accelerate moisture loss
- Encourage some weeds
- Produce visible brown or yellow patches
- Increase susceptibility to traffic and environmental stress
- Cause scalping on bumps and slopes
A low setting can also overload the mower if the grass is tall. The result may be clumping, poor discharge, rapid battery drain, belt strain, or engine bogging.
Step 4: Match the Cutting Height to the Grass Type
Identify whether the lawn contains cool-season or warm-season grass before selecting a height. Different grasses store leaf tissue and growing points at different levels, so one universal setting cannot produce healthy results everywhere.
The ranges below are practical starting points. Local climate, cultivar, shade, irrigation, and maintenance quality may justify a higher or lower setting.
Suggested cutting heights for common grasses
| Grass type | General mowing range | Practical starting point |
|---|---|---|
| Kentucky bluegrass | 2–3.5 in. | 3 in. |
| Perennial ryegrass | 2–3 in. | 2.5–3 in. |
| Fine fescue | 2.5–4 in. | 3–3.5 in. |
| Tall fescue | 3–4 in. | 3.5 in. |
| Bermudagrass | 0.5–2 in. | Depends on mower type |
| Zoysiagrass | 1–2.5 in. | 1.5–2 in. |
| Centipedegrass | 1.5–2.5 in. | 2 in. |
| St. Augustinegrass | 2.5–4 in. | 3–4 in. |
| Bahiagrass | 3–4 in. | 3–4 in. |
For regional recommendations, consult a local agricultural extension service, turf adviser, seed supplier, or sod producer. Cultivar-level guidance is more accurate than advice based only on a broad grass category.
Raise the height in shade
Grass in shade usually benefits from a higher cut because it needs more leaf area to capture limited light. Raising the mower by approximately 0.5 inch is a reasonable starting adjustment when the grass species permits it.
Mowing lower does not compensate for weak growth in shade. It usually removes the leaf area the plant needs most.
Adjust for warm- and cool-season growth patterns
Cool-season grasses grow strongly during mild spring and autumn conditions. Warm-season grasses are most active during hot weather and may become dormant when temperatures fall.
Base mowing frequency on growth rate rather than a fixed calendar. The correct height remains useful only when mowing occurs often enough to follow the one-third rule.
Step 5: Measure the Grass Before Mowing
Measure the lawn at several representative points before choosing a deck setting. This prevents excessive removal and reveals whether some areas are growing faster than others.
Avoid measuring only one tall blade. Use the average height of the grass canopy.
Use the one-third mowing rule
Remove no more than one-third of the grass blade’s height in one session. This guideline reduces sudden stress and helps preserve enough leaf area for continued growth.
Use this simple formula:
Minimum finished height = Current grass height × ⅔
Examples:
| Current grass height | Lowest recommended finished height for one mowing |
|---|---|
| 3 in. | 2 in. |
| 4.5 in. | 3 in. |
| 6 in. | 4 in. |
| 7.5 in. | 5 in. |
If grass is 6 inches tall but the target is 3 inches, do not cut directly to 3 inches. Mow first at about 4 inches, allow recovery, and lower the height gradually over later sessions.
Measure multiple zones
Check at least three types of location:
- An open, sunny area
- A shaded section
- A fast-growing or irrigated area
- A slope or uneven section
- A thin or stressed patch
Use the tallest healthy area to plan the first mowing pass. You can then make a second pass only if it does not violate the one-third rule.
Step 6: Adjust the Lawn Mower Safely
Turn off the mower completely before changing its cutting height. Wait for all moving parts to stop, remove the battery or safety key, or disconnect the spark-plug wire.
Never adjust a mower while the engine or blade is running.
Adjust a single-lever mower
A single-point height adjustment changes all four wheels through one lever. It is fast and reduces the risk of mismatched wheel positions.
To adjust it:
- Park the mower on a level surface.
- Shut down and isolate the power source.
- Pull the lever away from its locking notch.
- Move it toward the higher or lower setting.
- Confirm that it locks fully into position.
- Check that the deck does not wobble.
Single-lever systems save time, but linkage wear can make the deck uneven. Inspect the mechanism if one corner appears lower.
Adjust a four-lever mower
A four-point system uses an independent lever at each wheel. All levers normally need to occupy the same corresponding notch.
To adjust it:
- Isolate the mower’s power.
- Set the first wheel to the chosen position.
- Match the remaining three wheels.
- Count the notches rather than relying on appearance.
- View the deck from the front and sides.
- Correct any mismatch before mowing.
One incorrect wheel setting can tilt the blade plane and create stripes, scalping, or an uneven finish.
Adjust a riding mower
Most riding mowers use a deck-lift lever, dial, or pedal. The displayed height can be an approximation rather than an exact blade measurement.
Follow these steps:
- Park on a flat surface.
- Set the parking brake.
- Turn off the engine and remove the key.
- Set all tires to the recommended pressure.
- Select the desired deck position.
- Inspect deck levelling according to the manual.
- Check anti-scalp wheel clearance where applicable.
Anti-scalp wheels should not normally carry the full deck weight. Their role is to reduce deck contact when the mower crosses a high point.
Adjust a robotic mower
A robotic mower may use a physical dial, deck control, or app-based setting. Check whether the displayed unit represents millimetres, inches, or a numbered level.
Lower robotic mowers gradually. Because they cut frequently, small changes can alter the amount of leaf tissue removed each day.
Step 7: Test the Setting on a Small Area
Mow a short test strip before cutting the whole lawn. A test pass shows whether the mower is leaving the intended height without scalping, tearing, bogging, or producing heavy clumps.
Choose a representative area rather than the flattest corner of the property.
Inspect the test strip
Look for:
- A consistent surface
- No exposed soil or crowns
- No uncut strips
- Minimal clumping
- Cleanly cut leaf tips
- No deck contact on bumps
- Acceptable mower speed and discharge
If the cut appears yellow immediately, inspect the grass more closely. Exposed lower stems, excessive removal, or a dull blade may be responsible.
Measure the finished height
Place a ruler vertically at several points and measure from the soil surface to the top of the grass canopy. Do not measure from the top of the thatch layer unless it matches the true ground surface.
Record at least five measurements and calculate a simple average. A variation of several millimetres is normal on an uneven home lawn.
Adjust one level at a time
If the grass remains too tall, move the deck down by one position and test again. Large jumps increase the chance of scalping and make it harder to identify the best setting.
Raise the deck immediately if the test exposes soil, crowns, or dense brown stems.
Step 8: Mow at the Correct Height and Technique
Mow when the grass is reasonably dry and the blade is sharp. Correct deck height cannot compensate for wet turf, excessive speed, or a damaged cutting blade.
A clean cut seals more efficiently than a shredded leaf tip and gives the lawn a more even colour.
Use an appropriate mowing speed
Walk or drive slowly enough for the blade to process the incoming grass. Slow down when growth is dense, damp, or unusually tall.
Excessive speed can leave uncut blades and uneven rows. On battery mowers, dense grass may also trigger automatic power increases that reduce runtime.
Overlap each pass
Overlap the previous path slightly so the mower does not leave narrow strips between passes. A modest overlap is usually enough; excessive overlap wastes time and energy.
Change mowing direction periodically. Repeatedly following the same path can encourage grass to lean and may create wheel ruts in soft soil.
Handle clippings correctly
Short, dry clippings can normally remain on the lawn if they are spread evenly. They decompose and return nutrients without automatically causing thatch.
Collect or redistribute clippings when they:
- Form heavy piles
- Block sunlight from the grass below
- Remain wet and matted
- Contain mature weed seeds
- Cover diseased areas that require specific management
Step 9: Verify and Record the Final Cutting Height
Recheck the lawn after mowing instead of assuming the lever position produced the intended result. Measure several sections after the grass has had a few minutes to stand upright.
A written reference saves time during future mowing sessions.
Create a mower setting chart
Record the tested result for each useful position:
| Mower setting | Measured result | Best use |
|---|---|---|
| Position 2 | Add measured height | Low end for suitable conditions |
| Position 3 | Add measured height | Regular active growth |
| Position 4 | Add measured height | Hot, dry, or shaded conditions |
| Position 5 | Add measured height | First pass on overgrown grass |
Do not copy another owner’s chart, even if the mower model appears identical. Tire wear, deck condition, blade type, and lawn surface can produce different results.
Recalibrate after maintenance
Measure again after:
- Replacing a blade
- Changing wheels or tires
- Repairing deck linkages
- Adjusting tire pressure
- Installing a different blade type
- Striking a solid object
- Noticing uneven cutting
A bent blade or damaged spindle is a safety issue, not just a cosmetic problem. Stop using the mower until the cause is inspected and corrected.
How Seasonal Conditions Change the Best Cutting Height
Raise or maintain a moderate mowing height during heat, drought, and shade stress. Lowering the deck simply to mow less often can weaken the lawn and expose the soil.
Seasonal changes should remain within the grass species’ tolerated range.
Spring
Growth may accelerate quickly in spring, so mow often enough to avoid removing more than one-third at once. Do not begin with the lowest setting merely to remove winter colour.
If the lawn is soft or waterlogged, delay mowing. Heavy equipment can compact soil and leave wheel ruts.
Summer
A slightly higher cut often improves soil shading and moisture retention during hot weather. It may also reduce rapid surface drying.
During drought, mow less frequently because growth slows. Avoid mowing severely wilted grass unless necessary.
Autumn
Continue mowing while the lawn is actively growing. Gradual height adjustments are safer than one severe final cut.
Remove or mulch leaves before they form a thick layer. Leaf cover can block light and interfere with an even mowing result.
Winter or dormancy
Dormant grass needs less frequent mowing, but local climate and grass type determine whether mowing should stop completely. Avoid mowing frozen, saturated, or brittle turf.
Do not use a low winter setting as a universal rule. Exposed crowns and soil may be more vulnerable to temperature swings and traffic.
Pro Tips for More Accurate Cutting Height
Prioritise measured results over deck labels. The lawn’s finished height is the only number that confirms the mower is performing as expected.
- Measure on firm ground: Wheels sink into soft soil and lower the blade relative to the lawn.
- Check tire pressure: Unequal pressure can tilt a riding mower deck.
- Sharpen the blade: A sharp blade improves cut quality but does not change the nominal height.
- Use smaller changes: Adjust one notch at a time.
- Raise the deck on rough terrain: Additional clearance reduces scalping.
- **Mow more frequently during rapid